
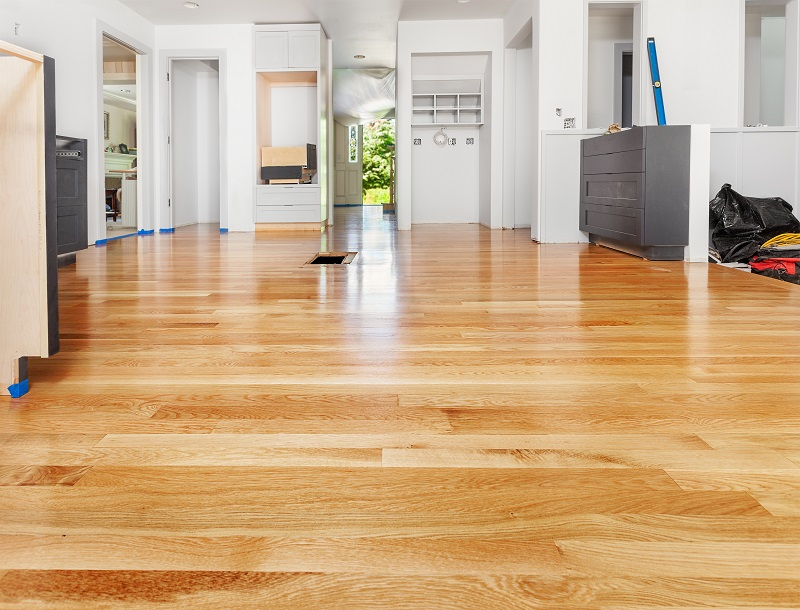
A whole home floor project can feel large at first, because every room has different light, traffic, and moisture. A clear plan helps you choose one floor that works in most rooms, or a small set of floors that look good together. Start by thinking about how you live in the home, not only about colour. A quiet bedroom, a busy hallway, and a kitchen used for family meals do not need the same surface in the same way, even if they share a style.
Start With a Room List
Write down each room, how it is used, and who uses it most. Note where shoes are worn, where pets sleep, where spills are likely, and where chairs move often. This list stops you from buying a floor that looks right in a showroom but fails in daily use. It also helps you see where you can use the same plank through open spaces, which can make a home feel larger and calmer. Keep the list simple, and add notes about light, because a plank can look darker in a north facing room.
Measure Twice, Then Add Room
Measure each room at its longest and widest points, and draw a rough sketch with doors, closets, and fixed items. Do not trust a guess or an old listing size, because small errors add up across a whole home. When you are ordering LVP in wholesale quantities, accurate totals matter even more, because you want enough planks for cuts, closets, and future repairs. Measure twice on different days if you can, and keep the numbers in one place so you can compare them before you order.
Add Extra Planks on Purpose
Order extra planks beyond the exact floor area, because cuts around doors, vents, and odd corners use more material than a simple rectangle calculation suggests. Extra planks also help later, when one plank is damaged and you need a close match. Colour batches can change over time, so a spare box kept in a dry place is worth more than a perfect match search later. Store spares flat, away from heat and damp, and keep the product details with them for reference.
Compare Wear Layers First
The wear layer is the clear top coat that protects the printed design. In busy rooms, a thicker wear layer can help the floor resist scuffs from shoes, chair legs, and pet claws. In a low traffic bedroom, a thinner wear layer may still last well, but it may show wear sooner in a hallway. Ask what the wear layer is, and match it to the room, not only to the price range. A floor that suits a rental hallway and a quiet study in the same way is rare, so check room by room.
Check How the Core Feels
The core is the middle layer of the plank, and it affects how solid the floor feels underfoot. A rigid core can feel more stable and can help bridge small uneven spots, while a softer core may feel less firm in a large open room. Walk on samples if you can, and notice sound as well as feel. Some cores sound hollow on a hard subfloor, while others feel quieter with good underlayment. The right core depends on your subfloor, your room size, and how much noise matters in your home.
Choose a Style for Rentals
Rental homes need floors that are easy to clean, hard to stain, and simple to repair. A neutral wood look often works across many tenant tastes, and it hides dust better than a very dark or very pale finish. For landlords, luxury vinyl plank flooring can make sense when several rooms or several homes need the same durable look. Still, check the locking system and the cleaning guide, because a floor that is hard to install or hard to clean will cost time even if the plank itself is strong.
Think About Water Room by Room
Vinyl plank resists water better than hardwood or laminate, but that does not mean every plank belongs in a wet room. Kitchens, entries, laundry rooms, and bathrooms each have different risks. A kitchen may have spills that are cleaned quickly, while a bathroom may have standing damp near a tub. Check the maker guidance for each room, and pay attention to joints, edges, and subfloor preparation. Clean spills promptly, use mats at entries, and keep bath water off the floor where you can.
Match Color Across Open Spaces
Color looks different under morning light, evening lamps, and large windows. Take a sample home and look at it in each room at different times of day. Put it next to cabinets, trim, and furniture, because a warm wood tone can clash with cool grey walls, and a cool tone can look flat next to warm oak cabinets. In open plan homes, using the same plank through living, dining, and kitchen areas can help the space flow. If you change plank in a doorway, use a clean transition and check that heights match.
Plan Delivery and Storage
Planks need time to adjust to your home before installation, so plan delivery before the install date, not on the same morning. Store boxes flat in the room where they will be installed, away from direct sun and damp, and follow the maker guidance for acclimation time. Check boxes on arrival for damage, and count them against your order. A short delay for acclimation is better than a rushed install that later shows gaps or lifting, especially when indoor temperature and humidity change with the seasons.
See Samples in Dalton
Shoppers in Dalton, GA who want to compare samples in person can visit Sam’s Flooring and ask about plank thickness, wear layers, and room suitability before they commit to a large order. Bring your room list, measurements, and photos of light and furniture, because those details help a helpful discussion stay focused. Ask about transitions, trim, and underlayment, and ask how spare planks should be stored. A short visit with clear notes can prevent a large order mistake, and it can help you feel sure about color and texture.
Avoid Common Ordering Mistakes
One common mistake is ordering only for visible floor area and forgetting closets, pantry floors, and cuts. Another is choosing a plank by a small online photo, which can hide texture, sheen, and grain variation. A third is skipping subfloor checks, because a plank floor will show bumps, dips, and loose boards underneath. Clean, dry, and level subfloors matter for click systems and for glue down systems alike. Take time to fix subfloor problems first, even if it delays the project by a day.
Check Transitions and Trim
Transitions matter where a plank floor meets tile, carpet, or a different height. A poor transition can catch shoes, collect dirt, and look unfinished, even when the main floor looks good. Check each doorway, stair edge, and room change on your sketch, and list the trim pieces you need for those spots. Match trim color to the plank or to the trim in the room, and check that the height change is safe to walk over. Planning trim early also helps the installer work in order, instead of stopping to find a missing piece on install day.
Use a Final Checklist
Before you order, check your list one more time. Confirm room totals, extra planks, wear layer needs, water risks, color matches, and transition pieces. Confirm delivery, storage, and acclimation time, and confirm who will install the floor and what tools are needed. Write down the product name, color, and batch details, and keep them with your spare planks. A calm final check takes only a few minutes, but it can save weeks of rework and help your whole home floor look planned, not patched together.